How To Make Home Made Butter In Your Kitchen That Is Preservative And Colour Free
Whilst chatting with Samantha Hadfield (my new fitness trainer), she asked me to share some of my fave chemical free recipes in our secret Facebook group ehehehheheh (it’s a secret). I thought to myself, actually I should share this with you guys too.
To start off, I make home made butter using 100% pasteurised fresh cream. I usually use whipping cream, though you can also use double cream.
How To Make Home Made Butter In Your Kitchen
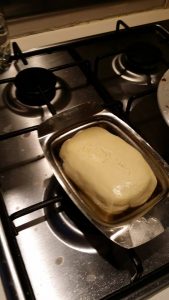
Pour the tub of cream in any bowl but as I typically use 4 x 600mls of whipping cream, I have a large stainless steel pot that I use as my churn. Stainless steel is great because it allows the cream to retain its coolness. I use an electric mixer and the entire process takes about half an hour.
First the cream doubles in size, then it shrinks. You know you are 3/4 done when it starts to look like scrambled eggs. Within seconds, the butter separates from the buttermilk. I save the buttermilk for use later. I pour in cool tap water to the butter and whisk a bit more to try and bring out more of the butter milk. I save it for later use. I add more water one more time.
If you like unsalted butter, then your butter is ready. I prefer not to use a muslin to squeeze the water out as that wastes some of my butter. The butter is too delish to be lost on the muslin. I prefer mine salted, so I add a dash of salt over the butter and water the final time and whisk.
So there you have it, that’s how to make home made butter that is preservative and colour free. You just have to resist the urge to eat it like cheese in one sitting. I tend to freeze the excess that I wouldn’t be using immediately. I reserve my butter for buttering my homemade bread.
Enjoy!
PS please leave a comment below on what you think of this article. There’s love in sharing too 😀


Thanks for sharing!